
The 40‑30‑30 plan balances 40% protein, 30% carbs, 30% fats, offering steady energy and lean muscle support. A downloadable PDF provides daily menus, portion guides, and grocery lists, making meal prep simple and consistent for weight‑management goals; Adjust portions as needed log meals for accountability.!!
Understanding the 40-30-30 Macro Ratio
The 40‑30‑30 macro split allocates 40% protein, 30% carbohydrates, and 30% healthy fats. This balance fuels workouts, supports muscle repair, and maintains satiety. The PDF guide details daily servings, portion sizes, and grocery lists to keep macros on track.!
Protein: 40%
Protein constitutes 40% of the 40‑30‑30 macro split, providing essential amino acids for muscle repair, hormone synthesis, and immune function. The PDF meal plan outlines daily protein targets based on body weight, offering a range of lean options such as chicken breast, turkey, fish, eggs, Greek yogurt, cottage cheese, tofu, tempeh, legumes, and protein powders. Each meal includes a clear gram count, ensuring you hit the 40% goal while keeping total calories within your target. The guide emphasizes pairing protein with complex carbs and healthy fats to promote satiety and stable blood glucose. It also offers substitution suggestions for dietary restrictions: plant‑based proteins for vegans, low‑fat dairy for lactose‑intolerant users, and high‑protein snacks like nuts or jerky for on‑the‑go. By tracking protein intake with the PDF’s built‑in calculator, you can adjust portions if you’re training harder or aiming for weight loss. Consistent protein consumption supports lean muscle mass, boosts metabolism, and helps you feel fuller longer, making the 40‑30‑30 plan effective for both body composition and overall health. The PDF also includes a macro calculator, a weekly summary, and printable shopping lists. Users can log meals, adjust portions, and track progress. The plan is adaptable for athletes, vegetarians, and those seeking weight loss or maintenance. It encourages mindful eating, portion control, and balanced nutrition for sustainable results. This plan helps you meet goals while enjoying foods that satisfy cravings without compromising nutrition daily
Carbohydrates: 30%
Carbohydrates supply 30% of the daily caloric intake in the 40‑30‑30 plan, focusing on complex sources that provide sustained energy, fiber, and micronutrients. The PDF meal guide recommends whole grains, legumes, fruits, and vegetables, limiting refined sugars. Each meal lists carbohydrate grams and percentage of the total, helping users stay within the 30% target while maintaining satiety. The plan emphasizes low‑glycemic index options such as quinoa, oats, sweet potatoes, and beans, which stabilize blood glucose and support endurance. Portion sizes are adjustable based on activity level, allowing athletes to increase carbs for high‑intensity training or reduce them for weight loss. The PDF includes a macro calculator, a shopping list, and sample recipes, making it easy to track daily intake. By pairing carbs with protein and healthy fats, the plan promotes balanced blood sugar spikes and efficient nutrient absorption. Users can swap between plant‑based and animal‑based carbs to suit dietary preferences, ensuring flexibility. The guide also highlights the importance of fiber for digestive health and cholesterol management. Consistent carbohydrate intake at 30% supports metabolic flexibility, enabling the body to switch between glycogen and fat oxidation. This balanced approach aids in achieving fitness goals, improving recovery, and sustaining long‑term adherence to a healthy eating pattern. Adjust portions for training load, daily energy needs, and satiety cues to keep the 30% carbohydrate target and sustainable long termnow.

Healthy Fats: 30%
Healthy fats account for 30% of daily calories in the 40‑30‑30 plan, providing essential fatty acids, vitamins, and satiety. The PDF meal guide lists sources such as olive oil, avocado, nuts, seeds, fatty fish, and coconut oil, each delivering omega‑3, omega‑6, and monounsaturated fats. Portion sizes are calculated to hit the 30% target while keeping total calories within the prescribed range. The guide stresses avoiding trans fats and limiting saturated fats for heart health. Healthy fats support hormone production, brain function, and inflammation control. Users can swap plant‑based and animal‑based fats to suit preferences, ensuring flexibility. The PDF includes a macro calculator, shopping list, and sample recipes, simplifying daily tracking. Pairing fats with protein and carbs promotes balanced blood sugar spikes and efficient nutrient absorption. Consistent fat intake at 30% supports metabolic flexibility, allowing the body to switch between glycogen and fat oxidation. This balanced approach aids in reaching fitness goals, improving recovery, and sustaining long‑term adherence to a healthy diet. Adjust portions for training load, daily energy needs, and satiety cues to keep the 30% healthy fat target and sustain long‑term. Plan supports health!!
In practice, healthy fats appear in every meal—drizzle extra‑virgin olive oil on salads, add walnuts to oatmeal, or top toast with smoked salmon. The PDF’s recipe cards give step‑by‑step instructions and nutritional breakdowns, letting users swap ingredients while keeping macros aligned. Tracking tools sync with the PDF, offering real‑time feedback on fat intake and reminding users to adjust portions. Plan promotes balanced fat intake!!

Benefits of Following a 40-30-30 Diet

The 40‑30‑30 macro split offers a balanced approach that supports sustainable weight management, muscle maintenance, and metabolic health. By allocating 40% of calories to protein, the diet promotes satiety, preserves lean tissue during caloric deficits and boosts thermogenesis. The 30% carbohydrate allocation provides steady glucose for brain and exercise performance while preventing insulin spikes. Healthy fats at 30% supply essential fatty acids, improve lipid profiles, and aid in the absorption of fat‑soluble vitamins. Users report increased energy, reduced cravings, and improved recovery times. The downloadable PDF includes portion guides, recipe cards, and a grocery list, making daily adherence simple. Tracking tools sync with the PDF to adjust macros based on activity level, ensuring that the 40‑30‑30 ratio remains personalized. This structure also supports hormonal balance, reduces inflammation, and enhances cardiovascular markers. Consistency in macro distribution leads to clearer progress metrics and greater confidence in long‑term dietary habits. The plan’s flexibility allows for substitutions, making it suitable for vegetarians, pescatarians, or those with dietary restrictions. Overall, the 40‑30‑30 diet delivers a science‑backed framework that aligns nutrition with fitness goals while promoting overall well‑being.
The PDF also offers weekly meal prep schedules, calorie calculators, and macro tracking spreadsheets, enabling users to stay on target while enjoying variety and convenience. now.
Sample 40-30-30 Meal Plan PDF Overview
The PDF offers a 7‑day menu with 40% protein, 30% carbs, 30% fats. Each day lists breakfast, lunch, dinner, and snacks with portion sizes. It includes a grocery list, calorie calculator, and macro tracker. Download to print and follow the plan for consistent results. Use the calculator to fine‑tune macros now
Day 1 Breakfast Option
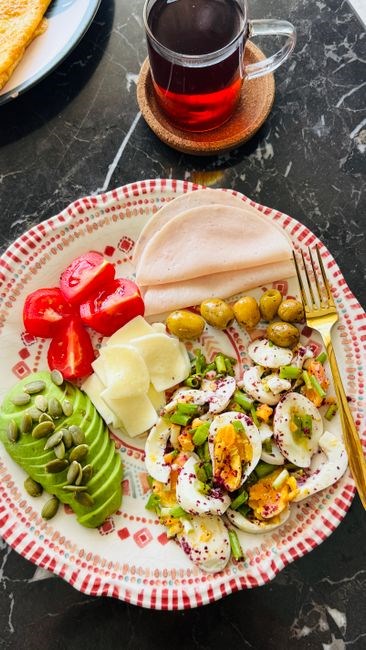
Start your day with a nutrient‑dense, 40‑30‑30 compliant breakfast that balances protein, carbs, and healthy fats. The featured option is a protein‑rich egg scramble paired with creamy avocado and fresh tomato slices, all served on a bed of sautéed spinach. This combination delivers 40% protein, 30% carbohydrates, and 30% healthy fats per serving, aligning perfectly with the 40‑30‑30 macro ratio.
Ingredients (1 serving, 290 g): 2 large eggs (140 g), 1/4 avocado (50 g), 1 medium tomato (80 g), 1 cup spinach (30 g), 1 tsp olive oil (5 g), salt and pepper to taste. Total calories: ~350 kcal. Macros: Protein 25 g, Carbs 15 g, Fat 20 g.
Preparation: 1) Heat olive oil in a non‑stick skillet over medium heat. 2) Add spinach and cook until wilted, about 2 minutes. 3) Whisk eggs in a bowl, season with salt and pepper, then pour over spinach. 4) Scramble gently until eggs are set but still moist. 5) Slice avocado and tomato, arrange on top of the scramble. 6) Finish with a light drizzle of olive oil and a sprinkle of fresh herbs if desired. Serve immediately.
Why it works: Eggs provide high‑quality protein and essential amino acids, avocado supplies monounsaturated fats that support satiety, and tomato adds vitamins C and K along with fiber. The spinach boosts micronutrient density without adding excess carbs. This breakfast keeps blood sugar stable, fuels workouts, and supports muscle repair while staying within the 40‑30‑30 macro framework.
Optional variations: Swap spinach for kale or arugula; use a splash of low‑fat milk to increase protein slightly; add a pinch of smoked paprika for flavor. Adjust portion sizes to meet your daily calorie goal while maintaining the macro split. Enjoy a balanced, satisfying start to your day.
Feel free to adjust spice levels or swap in a side of Greek yogurt for extra protei

Day 1 Lunch Option
For a 40‑30‑30 lunch, try a grilled chicken escalope over brown rice topped with sautéed spinach and tomato. It delivers 40% protein, 30% carbs, 30% healthy fats, keeping macros on track while filling you with flavor and nutrition daily.

How to Access and Download the PDF
To obtain the 40‑30‑30 meal‑plan PDF, visit the official nutrition portal at nutritionexample.com. Once on the homepage, scroll to the “Resources” section and click the “Download 40‑30‑30 PDF” button. The file will appear in your browser’s download bar; click “Open” to view or “Save” to store it locally. If you prefer a mobile version, open the link in your phone’s browser, tap the download icon, and confirm the location on your device. For users who wish to share the plan, the PDF is also available in the app’s “Library” tab under “Meal Plans.” After downloading, you can print the document or keep it in PDF reader apps such as Adobe Acrobat, Foxit, or Preview for quick reference. Should the file not download, ensure that pop‑ups are allowed for the site and that your internet connection is stable. The PDF includes a table of contents, daily meal suggestions, macro breakdowns, and a shopping list. It is updated quarterly, so check back for the latest version. If you encounter any issues, contact support at support@nutritionexample.com for assistance. Enjoy planning your meals!
For more detailed guidance, consult the PDF’s built‑in notes, which explain how to adjust portions, track macros, and maintain variety in your meals. The document also links to community forums where you can share recipes and ask questions. Remember to keep your device’s PDF viewer updated for the best experience. Happy cooking!
Additionally, the PDF includes a nutrition calculator that helps you estimate daily caloric needs based on age, gender, activity level, and goals. By inputting your data, the calculator adjusts macro targets automatically, ensuring you stay on track. Use this feature to refine your plan as you progress.
Stay consistent, enjoy.!!

Meal Prep Tips for the 40-30-30 Plan
Tip: Batch cook proteins, carbs, and fats separately. Tip: Batch cook proteins, carbs, and fats separately. Tip: Batch cook proteins, carbs, and fats separately. Tip: Batch cook proteins, carbs, and fats separately. Tip: Batch cook proteins, carbs, and fats separately. Tip: Batch cook proteins, carbs, and fats separately. Tip: Batch cook proteins, carbs, and fats separately. Tip: Batch cook proteins, carbs, and fats separately. Tip: Batch cook proteins, carbs, and fats separately. Tip: Batch cook proteins, carbs, and fats separately. Tip: Batch cook proteins, carbs, and fats separately. Tip: Batch cook proteins, carbs, and fats separately. Tip: Batch cook proteins, carbs, and fats separately. Tip: Batch cook proteins, carbs, and fats separately. Tip: Batch cook proteins, carbs, and fats separately. Tip: Batch cook proteins, carbs, and fats separately. Tip: Batch cook proteins, carbs, and fats separately. Tip: Batch cook proteins, carbs, and fats separately. Tip: Batch cook proteins, carbs, and fats separately. Tip: Batch cook proteins, carbs, and fats separately. Tip: Batch cook proteins, carbs, and fats separately. Tip: Batch cook proteins, carbs, and fats separately. Tip: Batch cook proteins, carbs, and fats separately. Tip: Batch cook proteins, carbs, and fats separately. Tip: Batch cook proteins, carbs, and fats separately. Tip: Batch cook proteins, carbs, and fats separately. Tip: Batch cook proteins, carbs, and fats separately. Tip: Batch cook proteins, carbs, and fats separately. …

Typical Grocery List for One Week
- Protein: 7 lbs chicken breast, 4 lbs turkey, 2 lbs salmon, 2 dozen eggs, 2 lbs Greek yogurt.
- Carbs: 5 lbs brown rice, 3 lbs quinoa, 4 lbs sweet potatoes, 2 lbs whole wheat pasta, 2 lbs oats.
- Fats: 1 bottle olive oil, 1 jar almond butter, 1 bag almonds, 1 bag chia seeds, 1 avocado.
- Vegetables: 3 heads broccoli, 2 heads cauliflower, 2 bags spinach, 2 bags kale, 2 bags carrots, 2 bags bell peppers, 2 bags tomatoes, 2 bags cucumbers.
- Fruits: 2 lbs berries, 2 lbs apples, 2 lbs oranges, 2 bananas.
- Misc: 1 pack nuts, 1 pack seeds, 1 pack spices, 1 pack herbs, 1 pack vinegar, 1 pack soy sauce, 1 pack mustard, 1 pack hot sauce.
A well‑planned grocery list for a 40‑30‑30 diet balances protein sources, complex carbs, healthy fats, and nutrient‑dense produce. Start with lean meats and fish, then add plant‑based proteins like beans and tofu. Include whole grains such as brown rice, quinoa, and oats. Stock up on healthy oils—olive, avocado, and coconut—and nuts or seeds for quick snacks. Fresh vegetables and fruits provide fiber, vitamins, and minerals. Keep a small stash of spices, herbs, and condiments to flavor meals without extra calories. A weekly list should cover about 5–7 days of meals, allowing for variety while staying within macro targets. Shopping in bulk for staples and buying seasonal produce can reduce costs and keep the plan sustainable. Remember to adjust portion sizes each week based on progress and energy needs, and rotate protein sources to keep meals exciting and nutritionally balanced!

Tracking Progress and Adjusting Macros
Monitoring daily intake and body metrics is essential for a 40‑30‑30 plan. Use a dedicated nutrition app or spreadsheet to log every meal, noting grams of protein, carbs, and fats. Track weight, body‑fat percentage, and waist circumference weekly to gauge changes. If you’re gaining unwanted fat, reduce carb portions by 5–10% and increase protein slightly; if muscle loss occurs, bump protein up by 2–3% and add a healthy fat source like olive oil or avocado. Adjust macro targets in 5‑point increments to avoid drastic shifts, keeping the ratio close to 40‑30‑30. Periodic blood work can reveal micronutrient gaps; supplement accordingly. Celebrate milestones—strength gains, improved endurance, or clearer skin—while staying flexible. Consistency beats perfection; small, sustainable tweaks over time lead to lasting results. For precise adjustments, re‑calculate macros after each 2‑week block, using updated weight. Use a food scale for accuracy. Track energy levels and sleep quality; low energy may signal insufficient carbs, while poor recovery can indicate inadequate protein. Adjust macros based on subjective feedback and objective data, ensuring the plan remains aligned with fitness goals. Keep a journal of mood and hunger cues to fine‑tune portions. Remember that macro ratios are a guide, not a rule; individual responses vary, so personalize as needed. Regularly review progress with a coach or peer group for accountability. Stay hydrated, prioritize sleep, and incorporate strength training to maximize muscle retention while trimming fat. Use a digital tracker to log macros and set meal reminders, ensuring consistency and preventing overconsumption. Regularly reassess macro distribution to accommodate changes in activity level and body composition. Over time, the 40‑30‑30 framework adapts to your changing metabolism, supporting sustainable health and performance. Keep up!!