Energy conversion is the process of changing energy from one form to another, essential for understanding how systems function. It involves transforming different energy types, such as mechanical, thermal, electrical, and chemical, to meet specific needs. Worksheets and activities provide hands-on learning opportunities, helping students grasp these fundamental concepts through practical examples and calculations.

Types of Energy
Energy types include kinetic, potential, thermal, electrical, and chemical. Kinetic energy is motion, potential is stored energy, thermal is heat, electrical is charge movement, and chemical is bond energy. These forms are fundamental in energy transformations and conversions.
2.1 Kinetic and Potential Energy
Kinetic energy is the energy an object possesses due to its motion, calculated using the formula ( KE = rac{1}{2}mv^2 ), where ( m ) is mass and ( v ) is velocity. Potential energy, on the other hand, is stored energy an object has due to its position or configuration. Gravitational potential energy, for example, is given by ( PE = mgh ), where ( m ) is mass, ( g ) is the acceleration due to gravity, and ( h ) is height. These two forms of energy are often interconnected, as when an object falls, its potential energy converts into kinetic energy. Worksheets and activities, such as those found in energy conversion PDFs, provide practical exercises for calculating and understanding these energy transformations, helping students visualize how energy changes from potential to kinetic states in real-world scenarios.
2.2 Thermal, Electrical, and Chemical Energy
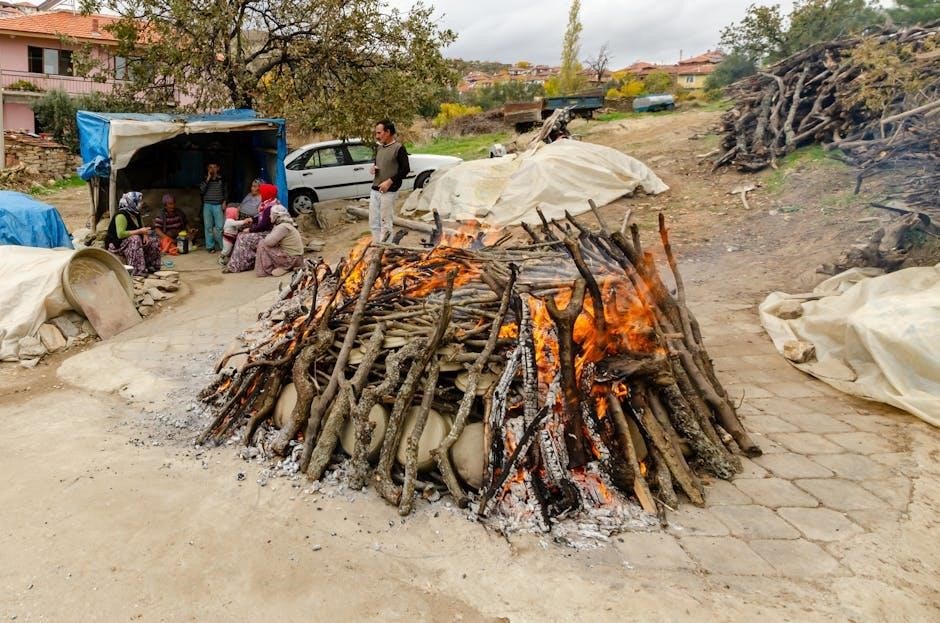
Thermal energy is associated with the motion and temperature of particles in a substance. It can be generated through friction, combustion, or electrical resistance. Electrical energy, often harnessed from batteries or circuits, involves the movement of charged particles. Chemical energy, stored in the bonds of molecules, is released during reactions like combustion or battery use. These forms of energy frequently interconvert in everyday devices. For instance, a stove converts chemical energy from fuel into thermal energy for cooking, while a generator transforms mechanical energy into electrical energy. Worksheets on energy conversion, such as those in PDF formats, provide exercises to identify and calculate these transformations. They often include diagrams of objects like microwaves, batteries, and light bulbs, where students match energy types to their sources and uses. These resources help learners understand how energy transitions between thermal, electrical, and chemical forms, emphasizing real-world applications and conservation principles.

The Law of Conservation of Energy
The Law of Conservation of Energy states that energy remains constant, transforming between forms without creation or destruction. In conversions, some energy is inevitably lost as thermal energy, maintaining the total energy balance.

3.1 Principles and Examples
The Law of Conservation of Energy highlights that energy cannot be created or destroyed, only transformed. This principle is fundamental in understanding energy conversions. For instance, in a swinging pendulum, potential energy converts to kinetic energy and vice versa, with some loss as heat. Similarly, a sliding block on an incline transforms gravitational potential energy into kinetic energy, eventually losing energy to friction and heat. These examples demonstrate how energy transitions between forms while maintaining the total energy balance. Worksheets often use such scenarios to help students calculate and visualize these transformations, reinforcing the concept through practical applications. By analyzing these examples, learners can better grasp how energy conservation applies to real-world systems and everyday phenomena.

Energy Conversion Processes
Energy conversion involves transforming energy from one form to another, such as mechanical to thermal or electrical to chemical. These processes are essential for powering devices, vehicles, and systems, and are often studied through educational worksheets and practical examples.
4.1 Mechanical and Thermal Conversions
Mechanical energy, which includes kinetic and potential energy, often converts into thermal energy through friction or heat dissipation. For instance, a moving bicycle converts kinetic energy into heat when brakes are applied. Conversely, thermal energy can be transformed into mechanical energy, as seen in steam engines where heat produces steam to drive pistons. These conversions are fundamental in understanding energy transfer efficiency and are commonly explored in educational worksheets. Such exercises help students visualize and calculate energy transformations, reinforcing the principles of the law of conservation of energy. By analyzing these processes, learners gain insights into real-world applications, such as vehicle braking systems and industrial machinery, where mechanical and thermal energy interactions are crucial.

4.2 Electrical and Chemical Conversions
Electrical and chemical energy conversions are vital in modern technology and daily life. Batteries, for example, store chemical energy that is converted into electrical energy when powering devices. Conversely, electrical energy can be stored as chemical energy in rechargeable batteries. Electric motors transform electrical energy into mechanical energy, enabling machines to operate. These conversions are fundamental in understanding energy storage and transfer. Worksheets often include problems involving these transformations, such as calculating energy efficiency or identifying conversion types in everyday devices. Chemical energy is also central in biological processes, like photosynthesis, where light energy is converted into chemical bonds. These examples highlight the interconnectedness of energy forms and their practical applications. By studying these conversions, students gain a deeper understanding of how energy is harnessed and utilized in various systems, from household appliances to industrial machinery.
Real-Life Applications
Real-life applications of energy conversion include household appliances like refrigerators and LED lights, which transform electrical energy into thermal or light energy. Renewable energy systems, such as solar panels and wind turbines, convert solar or wind energy into electrical energy, powering homes and industries efficiently.
5.1 Renewable Energy and Household Appliances
Renewable energy sources, such as solar, wind, and hydroelectric power, play a crucial role in energy conversion. Solar panels convert sunlight into electrical energy, while wind turbines transform wind kinetic energy into electricity. These systems are integrated into household appliances, reducing reliance on non-renewable resources. Energy-efficient devices like LED bulbs and smart home systems optimize energy use, minimizing waste. Worksheets and educational materials often highlight these applications, helping students understand practical energy transformations. For instance, a solar-powered water heater converts solar radiation into thermal energy, providing hot water for homes. Similarly, rechargeable batteries in appliances store electrical energy for later use. These examples demonstrate how renewable energy and energy-efficient technologies work together to create sustainable solutions for everyday needs. By studying these systems, students can gain insights into the importance of energy conservation and innovation in household applications;


Educational Resources
Educational resources, such as worksheets and PDF guides, provide structured learning tools for understanding energy conversion. These materials include practical examples, calculations, and exercises, helping students grasp key concepts in an interactive and engaging manner.
6.1 Content of Worksheets and Classroom Use
Worksheets on energy conversion are designed to engage students in understanding various energy forms and their transformations. They typically include activities such as identifying energy types, matching energy sources to their uses, and solving problems involving energy calculations. Many worksheets feature visual aids, like diagrams of windmills or batteries, to illustrate how energy changes from one form to another. For example, a worksheet might ask students to label the energy conversion steps in a hydroelectric power plant or calculate the kinetic energy of a moving object. These resources often align with curriculum standards, ensuring comprehensive coverage of topics like mechanical, thermal, electrical, and chemical energy. Classroom use of these worksheets promotes hands-on learning, encouraging students to apply theoretical knowledge to real-world scenarios. Teachers can also incorporate group discussions or presentations based on worksheet activities, fostering collaborative learning and deeper understanding of energy principles.
Calculations and Formulas
Key formulas include kinetic energy (KE = ½mv²) and gravitational potential energy (GPE = mgh). Worksheets often involve calculating total mechanical energy, energy transfers, and conversions, ensuring a strong foundation in energy principles and applications.

7.1 Mechanical, Kinetic, and Potential Energy

Mechanical energy is the sum of kinetic and potential energy within a system. Kinetic energy (KE) is associated with motion, calculated using the formula ( KE = rac{1}{2}mv^2 ), where ( m ) is mass and ( v ) is velocity. Potential energy (PE) is stored energy, often gravitational, calculated as ( PE = mgh ), with ( g ) as acceleration due to gravity and ( h ) as height. Worksheets often involve calculating total mechanical energy and analyzing energy transformations, such as a falling object converting potential energy into kinetic energy. These exercises emphasize the principle of energy conservation, where mechanical energy remains constant in isolated systems. Students practice applying these formulas to real-world scenarios, reinforcing their understanding of energy dynamics and transfers. Educational resources, like PDF worksheets, provide structured problems to master these calculations, ensuring a solid grasp of mechanical energy principles and their practical applications.
Energy Transfers and Transformations
Energy transfers involve moving energy between objects, while transformations change its form. Examples include mechanical to electrical in windmills and chemical to thermal in batteries. Worksheets help students identify these processes in real-world applications.
8.1 Definitions and Examples
Energy transfers occur when energy moves from one object to another, while transformations involve changing energy from one form to another; For instance, a bicycle converts chemical energy from food into mechanical energy for motion. Examples include a windmill transforming wind’s kinetic energy into electrical energy and a battery converting chemical energy into electrical energy. Energy transformations are fundamental in understanding how systems operate, from household appliances to industrial processes. The Law of Conservation of Energy states that energy cannot be created or destroyed, only transformed. Worksheets often use visual aids, such as images of a microwave converting electrical energy into thermal energy or a torch converting chemical energy into light and heat. These examples help students identify and categorize energy transformations, reinforcing their understanding of energy dynamics in real-world scenarios. Educational resources, like PDF worksheets, provide structured activities to explore these concepts through practical examples and calculations.
Energy conversion is vital for understanding how systems function, emphasizing the Law of Conservation of Energy. Worksheets and educational resources provide practical examples, helping students grasp energy transformations and their real-world applications effectively.
9.1 Importance and Additional Resources
Understanding energy conversion is crucial for advancing STEM education and real-world applications. It helps students grasp the fundamental principles of energy transformations and conservation. Additional resources, such as worksheets and educational guides, provide practical examples and exercises to reinforce learning. These materials often include problem-solving activities, diagrams, and real-life scenarios to engage students. Teachers can utilize these resources to create interactive lessons, fostering a deeper understanding of energy concepts. Online platforms offer downloadable PDF worksheets, simulations, and videos to supplement classroom instruction. These tools are invaluable for both students and educators, ensuring a comprehensive exploration of energy conversion and its applications. By leveraging these resources, learners can develop critical thinking skills and apply scientific principles to everyday situations. This approach not only enhances academic performance but also prepares students for future challenges in science and technology.