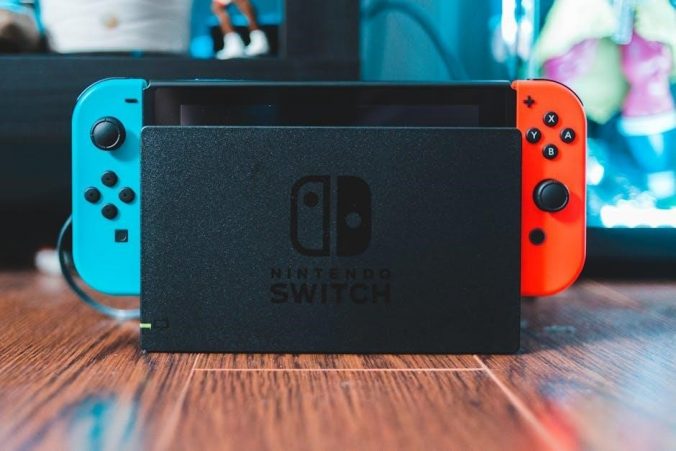
Welcome to the official user guide for the Mobile Gaming Corps Switch Controller. This manual provides comprehensive instructions for setup, customization, and troubleshooting, ensuring optimal performance for both Nintendo Switch and Windows PC compatibility. Designed with gamers in mind, this controller offers wireless Bluetooth connectivity, mappable buttons, and interchangeable faceplates, making it a versatile accessory for enhanced gaming experiences.
Manual
This manual provides detailed instructions for setting up, customizing, and troubleshooting the Mobile Gaming Corps Switch Controller. It covers essential features like wireless connectivity, button mapping, and faceplate installation, ensuring seamless functionality across Nintendo Switch and Windows PC.
2.1 Contents of the Manual
This manual includes a quick start guide, compatibility details, and setup instructions for both Nintendo Switch and Windows PC. It covers features like wireless Bluetooth connectivity, mappable back buttons, and swappable magnetic faceplates. Additionally, it provides troubleshooting tips for common issues and maintenance advice to ensure optimal performance. The guide is designed to help users make the most of their gaming experience with the Mobile Gaming Corps Switch Controller.
2.2 Quick Start Guide
To get started, power on the controller using the power button. Pair it with your Nintendo Switch by enabling Bluetooth or connecting via USB. For Windows PC, use Bluetooth or the included USB-C cable. Ensure the controller is fully charged before first use. Refer to the manual for detailed pairing instructions and troubleshooting tips to ensure a seamless gaming experience with your Mobile Gaming Corps Switch Controller.
Compatibility
The Mobile Gaming Corps Switch Controller is designed for seamless use with Nintendo Switch and Windows PC, offering both wireless Bluetooth and wired USB-C connectivity options.
3.1 Compatibility with Nintendo Switch
The Mobile Gaming Corps Switch Controller is fully compatible with the Nintendo Switch, including the OLED model. It connects via Bluetooth for wireless gaming or wired USB-C for a stable connection. The controller supports all Switch games and features motion controls for enhanced gameplay. Its design ensures seamless integration with the Switch ecosystem, offering a reliable and responsive gaming experience. No additional software is required for pairing.
3.2 Compatibility with Windows PC
The Mobile Gaming Corps Switch Controller is fully compatible with Windows PC, offering both wireless Bluetooth and USB-C wired connections. It seamlessly integrates with Windows operating systems, ensuring a responsive gaming experience. The controller supports popular PC games and applications, with mappable buttons for customized control schemes. Included is a USB-C cable for direct connectivity, making it easy to switch between wireless and wired modes for uninterrupted gameplay on your Windows PC.
Features
The Mobile Gaming Corps Switch Controller boasts wireless Bluetooth connectivity, mappable back buttons, and swappable magnetic faceplates. These features enhance customization and convenience for gamers.
4.1 Wireless Bluetooth Connectivity
Experience seamless wireless gaming with the Mobile Gaming Corps Switch Controller’s Bluetooth connectivity. It pairs effortlessly with Nintendo Switch and Windows PC, ensuring stable, lag-free performance. A long-lasting battery life enhances your gaming sessions, while the wireless design offers freedom from tangled cables. This feature is perfect for both home and on-the-go gaming, providing convenience and reliability for users.
4.2 Mappable Back Buttons
The Mobile Gaming Corps Switch Controller features mappable back buttons, allowing you to customize your gaming experience. Easily assign functions to the rear buttons using the included software or app. This feature enhances gameplay by providing quick access to frequently used actions. The mappable buttons are ergonomically designed, ensuring comfort and intuitive control. Perfect for competitive gaming, this customization option lets you tailor the controller to your preferences, optimizing performance and convenience.
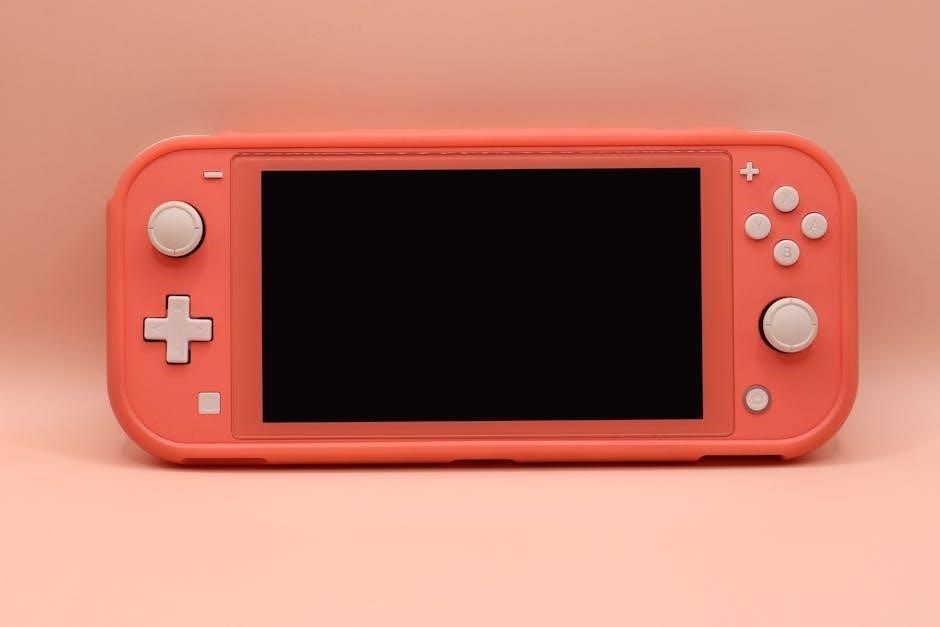
4.3 Swappable Magnetic Faceplates
The Mobile Gaming Corps Switch Controller includes swappable magnetic faceplates, allowing for easy customization. Choose from included designs or purchase additional styles to match your preferences. The magnetic attachment ensures a secure and seamless swap, enabling you to personalize your controller’s appearance effortlessly. This feature enhances both style and comfort, providing a tailored gaming experience that suits your unique taste and complements your setup.
Setup and Pairing Guide
This section provides a step-by-step guide to setting up and pairing your Mobile Gaming Corps Switch Controller with your Nintendo Switch or Windows PC. Follow the instructions to ensure a smooth connection and optimal performance for your gaming experience.
5.1 Pairing with Nintendo Switch
To pair your Mobile Gaming Corps Switch Controller with a Nintendo Switch, follow these steps: Ensure the controller is turned off, then hold the Home button for 3 seconds to enter pairing mode. On your Switch, navigate to the Bluetooth settings under “Controllers and Sensors.” Select the controller from the available devices list. Once connected, the controller will vibrate, confirming successful pairing. This process ensures a seamless gaming experience with your Nintendo Switch.
5.2 Pairing with Windows PC
To pair the Mobile Gaming Corps Switch Controller with a Windows PC, first ensure the controller is powered on. Press and hold the Home button for 3 seconds to enter pairing mode. On your PC, navigate to Bluetooth settings within the Devices tab of the Settings app. Select the controller from the list of available devices. For wired pairing, connect the controller using the provided USB-C cable. The PC will automatically recognize the device, ensuring a smooth connection for gaming.
Customization Options
The Mobile Gaming Corps controller offers extensive customization features, including button mapping and interchangeable magnetic faceplates, allowing users to personalize their gaming experience for optimal comfort and style.
6.1 Button Mapping
The Mobile Gaming Corps controller offers intuitive button mapping, allowing users to customize their gaming experience. With mappable back buttons, players can assign functions to suit their preferences, enhancing gameplay efficiency. The controller’s design ensures seamless customization, enabling personalized control layouts. This feature is particularly beneficial for gamers seeking tailored setups for various games. Detailed instructions for button mapping can be found in the user manual, ensuring easy configuration for all users.
6.2 Interchangeable Faceplates
The Mobile Gaming Corps controller features swappable magnetic faceplates, allowing users to personalize their gaming experience. With options like white and black designs, gamers can easily switch styles to match their preferences. The faceplates attach securely via magnetic connectors, ensuring a seamless and tool-free installation process. This feature enhances the controller’s aesthetic appeal and provides a fresh look for different gaming sessions. The interchangeable design adds versatility and satisfaction to the overall user experience.
Maintenance and Care
Regularly clean the controller with a soft cloth to prevent dust buildup. Avoid harsh chemicals and ensure proper storage. Charge the battery correctly to prolong its lifespan.
7.1 Cleaning the Controller
To maintain your controller, use a soft, dry cloth to wipe away dirt and dust from the surface. Avoid using liquids or harsh chemicals, as they may damage the finish or harm electrical components. Gently clean around buttons and joysticks, ensuring no moisture seeps inside. Regular cleaning prevents dust buildup and ensures smooth operation. Always unplug the controller before cleaning to avoid any accidental power issues. Proper care extends the lifespan and performance of your device.
7.2 Battery Care and Charging
For optimal battery performance, charge your controller using the provided USB-C cable. Avoid overcharging, as it may reduce battery lifespan. Use a high-quality charger to prevent damage. If the battery depletes completely, charge for at least 30 minutes before use. Store the controller in a cool, dry place when not in use. Replace batteries only with compatible, genuine parts to ensure safety and functionality. Proper care maintains reliable operation and extends battery life.
Troubleshooting Common Issues
This section addresses frequent problems such as connection dropouts, button malfunctions, and charging issues. Follow the steps below to resolve common issues quickly and effectively.
8.1 Connection Problems
If the controller disconnects or fails to pair, ensure it is fully charged and within range. Restart the controller by pressing the Home and buttons simultaneously until it rumbles. Check for Bluetooth interference from nearby devices. Ensure the console or PC is updated and in pairing mode. If issues persist, reset the controller by holding the Home button for 10 seconds. Refer to the pairing guide for detailed steps.
8.2 Button Malfunctions
If buttons are unresponsive or sticky, clean them with a soft cloth and ensure no debris is obstructing movement. Recalibrate the controller by pressing the Home and buttons simultaneously for 5 seconds. If issues persist, reset the controller by holding the Home button for 10 seconds. For persistent malfunctions, contact Mobile Gaming Corps support or refer to the warranty information in the manual.
Review and User Feedback
The Mobile Gaming Corps Switch Controller has received positive reviews for its wireless connectivity and customizable buttons. Users praise its sleek design and interchangeable faceplates, though some note occasional connectivity issues. Overall, it’s a solid choice for gamers seeking versatility and style.
9.1 Pros and Cons
The Mobile Gaming Corps Switch Controller excels with its wireless Bluetooth connectivity, mappable buttons, and swappable magnetic faceplates, offering customization and style. Its compact design and long battery life are notable advantages. However, some users report occasional connectivity issues, and the price is slightly higher than standard controllers. Overall, it’s a great option for gamers seeking versatility, though minor flaws may deter budget-conscious buyers.
9.2 User Reviews and Ratings
Users praise the Switchplate Wireless Controller for its sleek design, long battery life, and customizable features. Many reviewers highlight its compatibility with both Nintendo Switch and Windows PC, making it a versatile option. On average, it receives a 4.2/5 rating, with positive feedback on comfort and performance; However, some note occasional connectivity issues. Overall, it’s well-received by gamers seeking a premium, adaptable controller for enhanced gaming experiences.
The Mobile Gaming Corps Switch Controller is a versatile and feature-rich accessory designed for both Nintendo Switch and Windows PC gamers. With its sleek design, long battery life, and customizable options, it offers an enhanced gaming experience. While some users note minor connectivity issues, the overall reception has been positive. This controller is a great choice for those seeking a premium, adaptable, and high-performance gaming accessory.