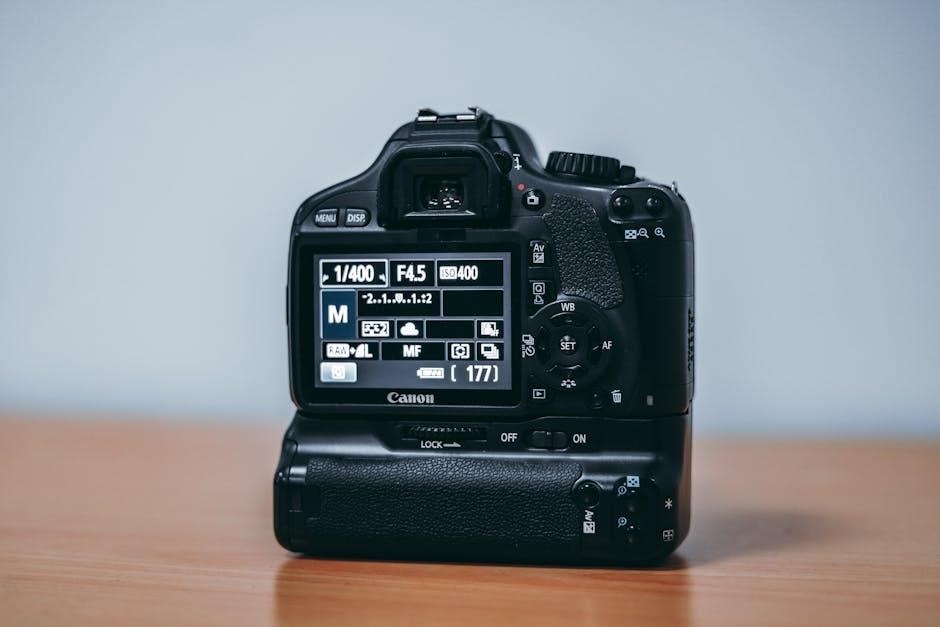
A manual camera settings cheat sheet is a handy guide to mastering aperture, shutter speed, and ISO. Perfect for quick reference, it helps photographers of all levels understand and control their camera settings efficiently, ensuring better results in various lighting conditions and creative scenarios.
Understanding the Basics of Manual Mode
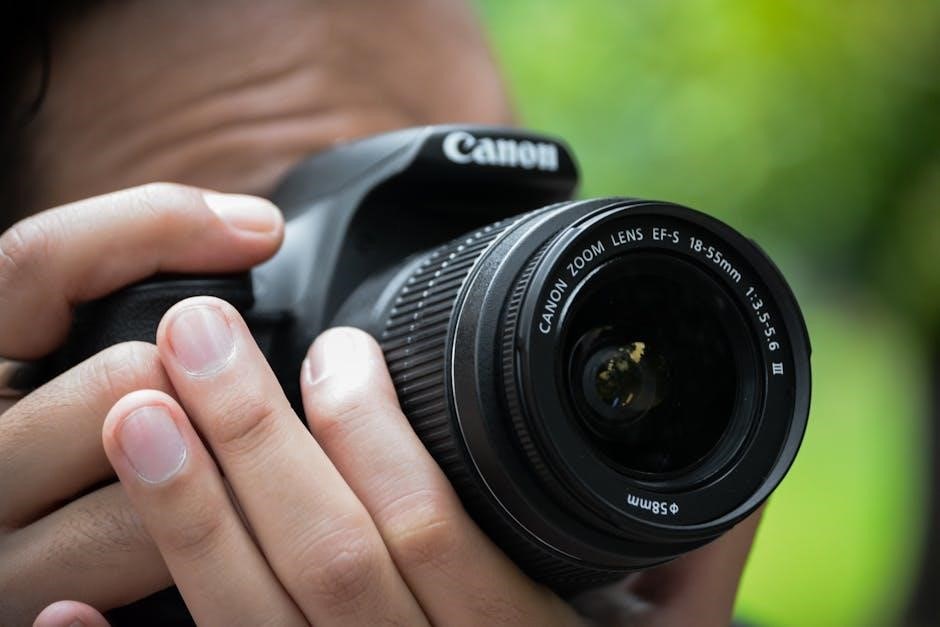
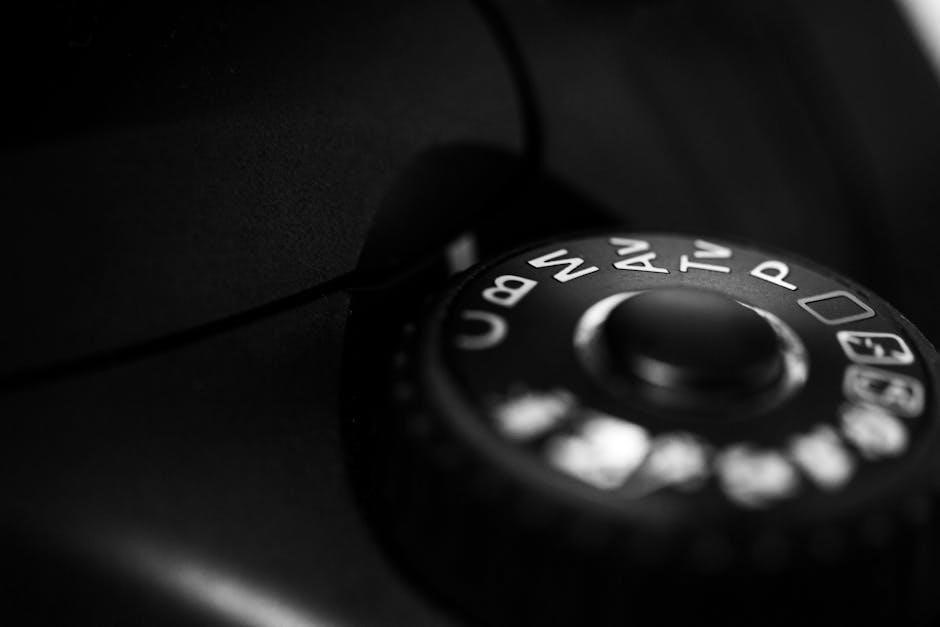
Manual mode gives photographers full control over camera settings, allowing creative freedom to capture images precisely as envisioned. It involves adjusting aperture, shutter speed, and ISO to achieve desired results. A manual camera settings cheat sheet simplifies this process, providing quick references for optimal setups in various scenarios. By mastering these fundamentals, photographers can balance exposure, manipulate light, and experiment with artistic effects, making manual mode a powerful tool for professional and amateur shooters alike;
Importance of a Cheat Sheet for Beginners
A manual camera settings cheat sheet is invaluable for beginners, offering step-by-step guidance and quick tips to master manual mode. It provides clear, concise references for understanding aperture, shutter speed, ISO, and white balance, helping new photographers navigate complex settings. By breaking down the fundamentals, a cheat sheet simplifies the learning process, ensuring photographers can confidently experiment and improve their skills. It’s an essential tool for transitioning from auto to manual mode, making photography more accessible and enjoyable for those starting their journey.
Mastering Aperture
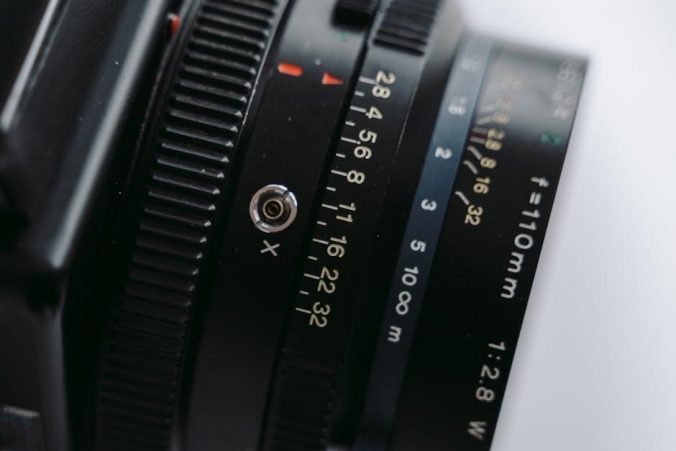
Aperture is a fundamental aspect of photography, controlling depth of field and light intake. A manual camera settings cheat sheet helps photographers understand aperture’s role in achieving desired effects, from sharp landscapes to blurred backgrounds, ensuring creative control over their images in various shooting scenarios.
How Aperture Affects Depth of Field
Aperture significantly impacts depth of field, determining how much of an image is in focus. A lower f-stop value (like f/2.8) creates a shallow depth of field, blurring the background and emphasizing the subject. Conversely, a higher f-stop (like f/11) results in a deeper depth of field, keeping more of the image sharp. This effect is crucial for composing visually appealing photos, whether isolating subjects or capturing expansive landscapes. A cheat sheet helps photographers quickly reference optimal aperture settings for desired effects in various scenarios, ensuring they can achieve their creative vision efficiently. By mastering aperture, photographers gain precise control over their images’ focus and aesthetics, making it an essential skill for both beginners and professionals.
Common Aperture Ranges and Their Uses
Aperture ranges are categorized into wide (small f-stop) and narrow (large f-stop) openings. Wide apertures like f/1.4 to f/2.8 are ideal for portraits, creating a shallow depth of field that isolates subjects. Medium apertures (f/4 to f/5.6) balance depth of field and light intake, suitable for group shots or street photography. Narrow apertures (f/8 to f/16) are best for landscapes or product photography, ensuring sharp focus across the image. A cheat sheet simplifies these ranges, helping photographers quickly select the right aperture for their creative goals, enhancing efficiency and precision in their work. This practical guide is indispensable for mastering manual camera settings and achieving professional results.
Best Practices for Aperture Settings
Mastering aperture requires understanding its impact on depth of field and light intake. Start by setting aperture based on your creative goal—shallow for portraits or wide for landscapes. Consider lighting conditions and adjust accordingly. Use a cheat sheet to reference common aperture ranges. For low light, wider apertures (lower f-stop) are ideal, while bright conditions often require narrower apertures. Experiment with hyperfocal distance for maximum sharpness. Always review your results and tweak settings as needed to achieve the desired effect, ensuring your photos reflect your artistic vision.
Shutter Speed Essentials
Shutter speed controls motion and light exposure, allowing you to freeze moments or create motion blur. Use a cheat sheet to adjust settings based on lighting conditions and achieve the desired effect.
Controlling Motion with Shutter Speed
Shutter speed is a powerful tool for controlling motion in photography. A cheat sheet helps you choose the right speed to freeze fast-moving subjects or create a motion blur effect. For sharp images, use faster speeds (1/500th of a second or higher) when shooting action. For creative blur, slower speeds (1/30th of a second or lower) can convey movement and dynamism. Adjusting these settings based on lighting conditions ensures optimal results, whether you’re capturing sports or artistic scenes.
Freezing Moments vs. Creating Motion Blur
Mastering shutter speed allows photographers to freeze moments or create motion blur. A cheat sheet guides you in selecting the right speed for your desired effect. Use fast shutter speeds (1/1000th of a second or faster) to capture sharp, action shots without blur. For artistic blur, slower speeds (1/30th of a second or slower) can emphasize movement and create a sense of dynamism. This technique is ideal for waterfalls or moving vehicles, adding creativity to your photos while maintaining control.
Creative Effects of Different Shutter Speeds
Exploring shutter speed opens up a world of creative possibilities. A cheat sheet helps photographers achieve stunning effects. Long exposures (seconds or minutes) create light trails or silky water, adding an ethereal quality. Medium speeds (1/30 ⎻ 1/60 second) introduce subtle blur, capturing movement naturally. Fast speeds freeze time, ideal for sharp action shots. Experimenting with these techniques enhances storytelling and adds artistic flair to your photography, making each image unique and impactful.
ISO Settings Explained
ISO measures your camera’s sensitivity to light. A cheat sheet simplifies understanding low ISO (bright lighting) and high ISO (low light), helping you balance noise and exposure for optimal results.
What is ISO and How Does It Work?
ISO measures your camera’s sensitivity to light. It works by amplifying the signal from the sensor, allowing you to shoot in various lighting conditions. Lower ISOs (100-400) are best for bright light, minimizing noise, while higher ISOs (6400-51200) capture images in low light but may introduce grain. Balancing ISO with aperture and shutter speed ensures proper exposure without compromising image quality. A cheat sheet helps you understand when to adjust ISO for optimal results in different scenarios.
Impact of High vs. Low ISO
High ISO (6400+) increases sensitivity for low-light shooting but introduces noise or grain, potentially degrading image quality. Low ISO (100-400) minimizes noise, ideal for bright conditions, ensuring sharp, clean photos. A cheat sheet helps photographers understand when to use high or low ISO, balancing creativity with technical quality for desired visual effects in various lighting scenarios.
Optimal ISO Usage Scenarios
ISO settings are crucial for capturing high-quality images in various lighting conditions. Use low ISO (100-400) in bright environments to minimize noise and ensure sharp photos. High ISO (6400+) is ideal for low-light situations, allowing you to shoot without flash but risking grain. A cheat sheet helps photographers adjust ISO effectively, balancing noise and lighting needs for optimal results. This guide ensures you make informed decisions, enhancing your photography skills.
White Balance Fundamentals
White balance ensures accurate colors by adjusting to lighting conditions. A cheat sheet helps master manual adjustments, preventing unwanted tints and enhancing image quality in any setting.
Understanding Color Temperature
Color temperature, measured in Kelvin (K), defines light’s warmth or coolness. Daylight is around 5500K, while tungsten light is 2800-3200K. A cheat sheet helps adjust white balance to match lighting conditions, ensuring accurate colors. Presets like Daylight, Cloudy, and Tungsten simplify adjustments. Understanding this balance is key to capturing natural hues and creating the desired mood in photos, especially in manual mode. This fundamental concept is essential for mastering white balance and enhancing image quality effectively.
Common White Balance Presets
White balance presets simplify color correction by matching lighting conditions. Common options include Auto, Daylight (5500K), Cloudy/Shade (6000-8000K), Tungsten (2800-3200K), and Fluorescent (3500-4500K). These presets help achieve accurate colors without manual adjustments. A cheat sheet lists these settings, guiding photographers to select the right preset for their environment. This ensures consistent results and reduces post-processing time, making it easier to capture images with natural hues and enhanced visual appeal in various lighting scenarios.
Adjusting White Balance Manually
Manual white balance allows precise color temperature adjustments, ensuring accurate hues in any lighting. Use a gray card or white object to set a custom balance, enhancing color consistency. This method is ideal for unique lighting conditions or creative effects. A cheat sheet provides step-by-step guidance, making manual adjustments easier. By fine-tuning white balance, photographers can achieve natural-looking images with minimal post-processing, ensuring vibrant and true-to-life colors in every shot.

Exposure Triangle
The exposure triangle is the foundation of photography, balancing aperture, shutter speed, and ISO to achieve perfect lighting. A cheat sheet simplifies this concept, helping photographers control light and create stunning images with ease.
Understanding the Relationship Between Aperture, Shutter Speed, and ISO
The exposure triangle consists of aperture, shutter speed, and ISO, which together regulate the light entering the camera. Aperture controls the lens opening, shutter speed manages exposure duration, and ISO adjusts sensor sensitivity. A manual camera settings cheat sheet helps photographers understand how these elements interact. For instance, lowering ISO reduces noise, while a wide aperture creates a shallow depth of field. Balancing these settings is crucial for achieving the desired visual effects in various lighting conditions.
How to Balance the Exposure Triangle
Balancing the exposure triangle involves adjusting aperture, shutter speed, and ISO to achieve optimal light levels. A manual camera settings cheat sheet offers practical tips, such as using metering modes to assess lighting conditions. By compensating one element with another—like increasing ISO for low light or closing the aperture for bright scenes—photographers can maintain desired exposure without sacrificing creative intent. This balance ensures images are neither overexposed nor underexposed, preserving details and achieving professional results.
Using Metering Modes for Accurate Exposure
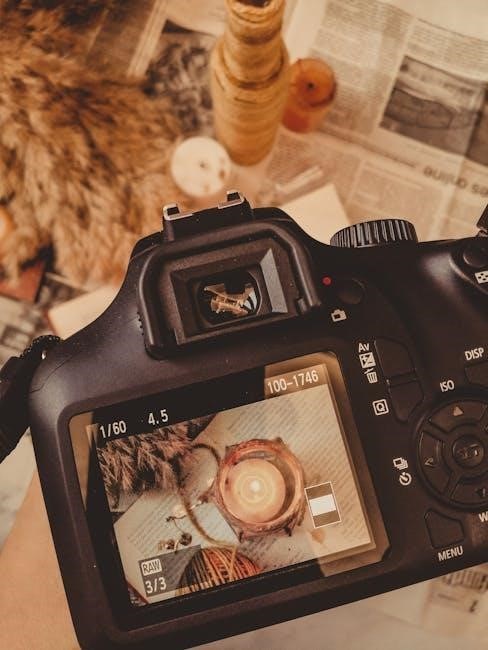
Metering modes are essential for achieving precise exposure in manual photography. A manual camera settings cheat sheet highlights three main modes: Matrix (Evaluative), Center-Weighted, and Spot. Matrix metering analyzes the entire scene, while Center-Weighted focuses on the subject in the center. Spot metering measures light from a specific area, ideal for high-contrast scenes. By selecting the right mode, photographers can accurately capture lighting conditions, ensuring well-balanced exposures that preserve details in both shadows and highlights, especially in challenging environments.
Using the Cheat Sheet Effectively
A manual camera settings cheat sheet streamlines your workflow, offering quick tips for common scenarios, lighting adjustments, and balancing exposure. It enhances efficiency for photographers.
Quick Tips for Common Shooting Situations
Use the cheat sheet to adapt to scenarios like portraits, landscapes, or low-light. For portraits, opt for wide aperture (f/1.8–f/2.8) to blur backgrounds. Landscapes benefit from narrow apertures (f/8–f/16) for sharp depth. In low-light, increase ISO (1600–6400) cautiously. For action, fast shutter speeds (1/500th–1/1000th) freeze motion. Adjust white balance presets to match lighting conditions. Refer to the cheat sheet for quick adjustments, ensuring balanced exposure and optimal results in any setting.
How to Adjust Settings for Different Lighting Conditions
Adapt your camera settings based on lighting conditions using the cheat sheet. In bright daylight, use a narrow aperture (f/8–f/11) and fast shutter speed (1/2000th–1/4000th) with low ISO (100–400). For cloudy or shaded areas, widen the aperture (f/2.8–f/5.6) and slow the shutter (1/60th–1/125th), raising ISO slightly (400–800). In low-light or indoors, use a wide aperture (f/1.8–f/2.8), slower shutter (1/30th–1/60th), and higher ISO (1600–6400). For night or astrophotography, use a wide aperture (f/1.4–f/2.8), very slow shutter (20–30 seconds), and moderate ISO (1600–3200).
Mastering manual camera settings is empowering. Use the cheat sheet to practice consistently and explore creative possibilities, ensuring continuous improvement in your photography journey always.
Practicing with the Cheat Sheet
A manual camera settings cheat sheet is an invaluable tool for consistent practice. Print it and keep it handy during shoots to quickly reference aperture, shutter speed, and ISO settings. Use it to experiment with different lighting conditions and creative techniques, ensuring you understand how each adjustment impacts your photos. Regular practice with the cheat sheet will help you master manual mode and improve your photography skills effectively over time.
Continuous Learning in Manual Photography
Continuous learning is essential for mastering manual photography. Regular practice and experimentation with different techniques will enhance your skills. Stay updated with new trends and resources, like manual camera settings cheat sheets, to refine your understanding of aperture, shutter speed, and ISO. By exploring various shooting scenarios and adapting to new challenges, you’ll grow as a photographer and consistently improve your ability to capture stunning images in manual mode.
Leave a Reply
You must be logged in to post a comment.